Quick Answer
The easiest way to use Melodyne in Studio One is by selecting an audio event you want to edit and press Ctrl+M. Alternatively, you can right-click on the audio event, go to “Audio,” and under “Audio Processing,” and select “Edit with Melodyne.”
How To Use Melodyne In Studio One – In Detail
We’ve all faced performance issues during our time as music producers. Some parts sound just right in our heads, but we can’t seem to make it happen during the recording.
Fortunately, if you happen to be a Studio One user, you’re one of the lucky ones. You’ll get to fully enjoy the benefits of Melodyne – one of the best audio editing software out there.
In this tutorial, we’ll go through all the steps necessary for you to begin using Melodyne in Studio One like a pro.
We’ll start with the installation process all the way to some pro tips on how to edit vocals.
Let’s get going!

What’s the Deal With Melodyne and Studio One?
Studio One was the first DAW in the industry that integrated Celemony’s Melodyne directly into its workflow. This might not sound like anything spectacular if you’ve never used Melodyne before. Still, experienced users can definitely confirm how that made their lives much more straightforward.
If you use Melodyne with any other DAW, there has to be a process of importing the audio into the Melodyne before editing it. This means longer waiting times and a lot of potentially clunky editing moves.
Having Melodyne integrated into Studio One bypasses the importing process and a seamless connection between audio edited in Melodyne and actual audio printed on the audio track.
This makes for an even more powerful and smoother editing experience.
How To Install Melodyne In Presonus Studio One
The installation process is super streamlined, so you don’t have to be bothered about it at all.
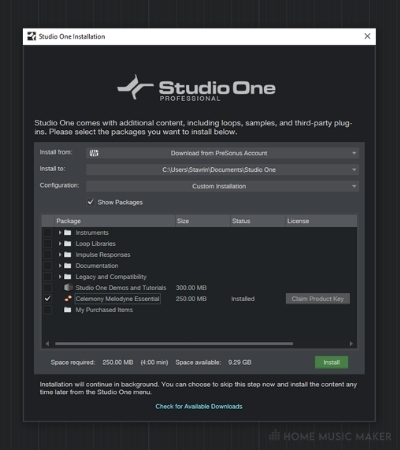
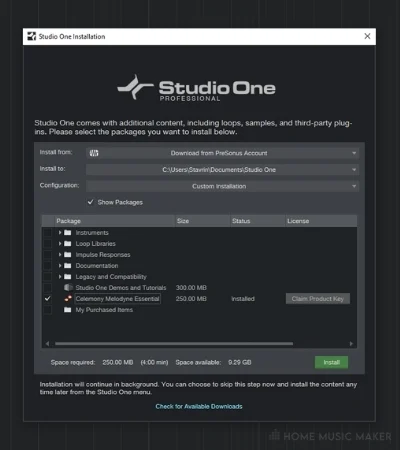
To install Melodyne, go to Studio One > Studio One Installation. On the list of products, you’ll find Celemony Melodyne Essential. Check the box right beside it and click Install, as seen below.
Once the installation process is initialized and finished, you can click on “Claim Product Key” and authorize your version of Melodyne.
Bear in mind that Melodyne is free only if you use the Professional version of Studio One.
In the Artist version, you get a free 30-day trial, but you’ll have to buy the software at some point.
Generally, once you initiate the installation through Studio One, the rest is a pretty smooth ride. Just closely follow all the step-by-step instructions, and you’ll be good to go.
Using Melodyne In Studio One
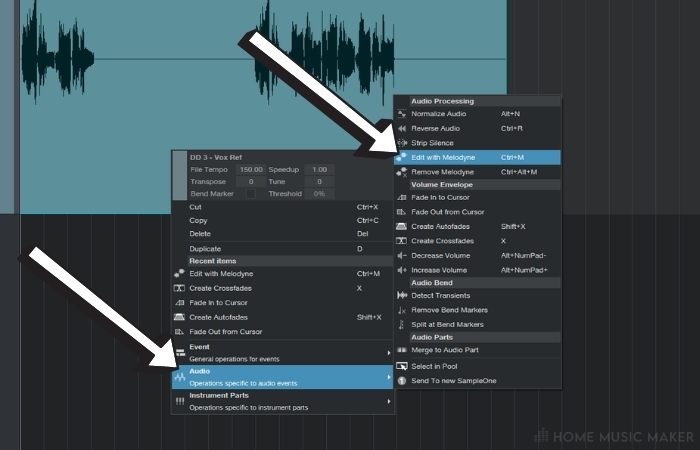

You can access Melodyne in two ways – either by a keyboard shortcut Ctrl+M (always recommended) or by right-clicking the audio event. Under Audio, choose Edit with Melodyne.
Check out the video below.
You can choose a snippet or a whole track, depending on what you want to edit.
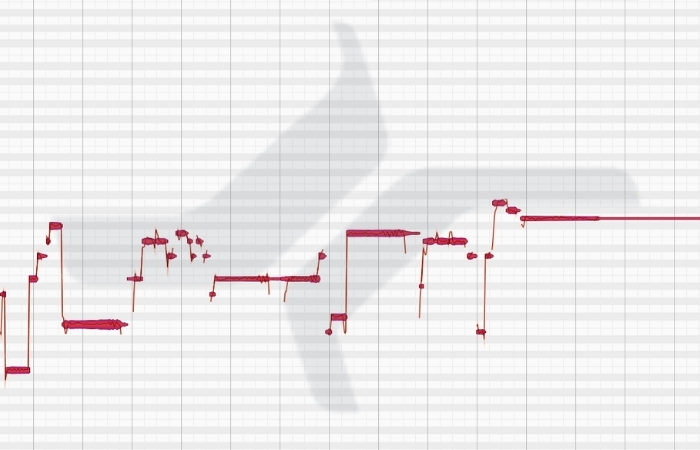
Once the Melodyne window pops up, an exact audio copy of the event you’ve selected will immediately be transferred to its editing panel. From then on, you can freely edit your audio, and all the changes will be applied to the waveform itself.
Depending on the audio source you want to edit, Melodyne has a couple of detection modes.
If you’re editing monophonic lines, Melodic detection mode will give you the best results. However, if you want to edit a single dead note within strumming chords, Polyphonic detection is the way to go.
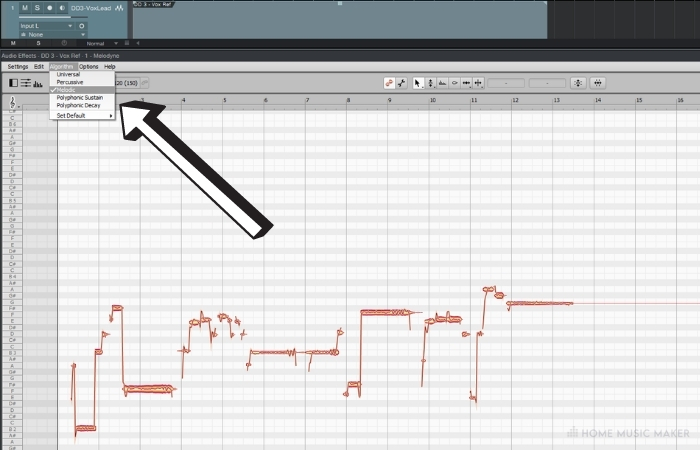
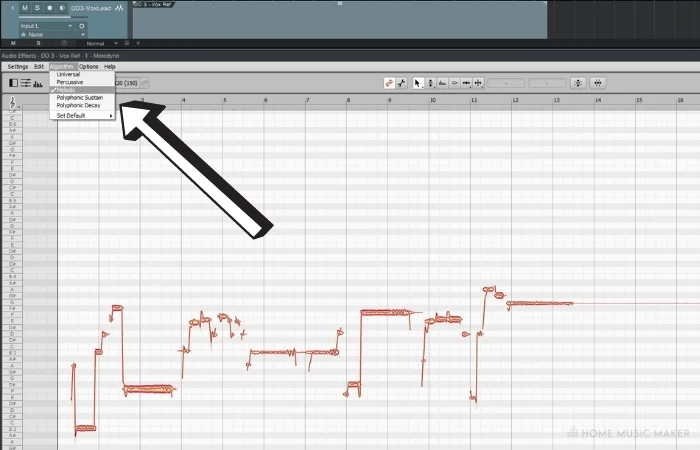
Suppose you want to edit polyphonic material but not get into every single note. In that case, Universal mode will do that for you.
Melodyne gives you an option to edit both pitch and timing of your performance. You can choose to let Melodyne’s algorithm do the editing job for you or do everything manually.
We’ll take a look at both approaches.
If you’re looking for an instant pitch and timing polish, Melodyne is perfectly capable of doing that. On top of the editor, right beside the pitch name and deviation windows, you’ll notice two significant icons – Correct Pitch Macro and Quantize Time Macro.
These two options are our automatic pitch and time editors.
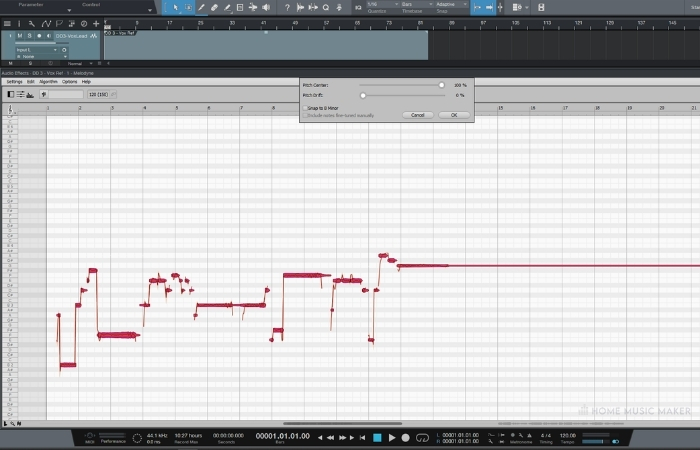
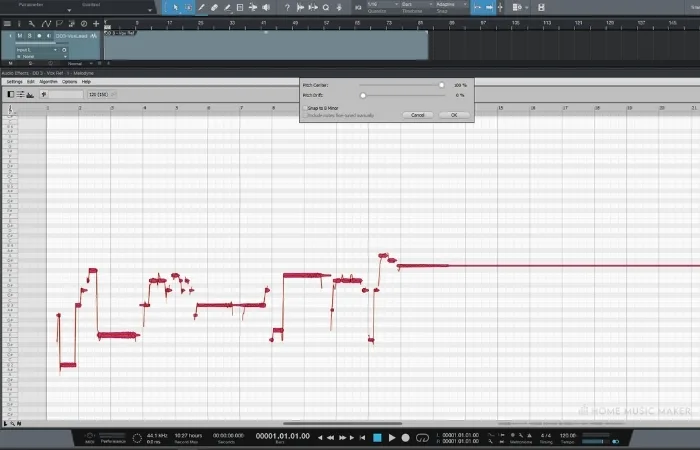
The pitch macro allows you to edit multiple notes or even a whole take with a click of a mouse. A great thing about it is that you can actually dose how much pitch correction you want to apply.
Setting your pitch center and pitch drift to 100% will give you that auto-tuned, apparently processed sound. You can, however, set those bars at a much more sensible percentage and get a natural-sounding performance that sounds much more in tune.
The same thing applies to the time correction button. Just set your preferred note value and slide the bar depending on how much you want to quantize your performance.
Although this process is incredibly convenient and powerful, you may want to manually edit some parts of your performance.
As much as Melodyne does a fine job on its own, I still wouldn’t wholly depend on it.
Here’s how I go about editing vocals to sound natural and right on the pitch center.
I do slide the pitch center pretty much all the way. This doesn’t affect the feel of the overall performance at all; it just brings everything to a more stable pitch. However, I do not touch the pitch drift bar but instead correct the pitch drift manually.
Here’s how to do it.
First of all, select a note you want to edit, then right-click and choose a Note Separation Tool.
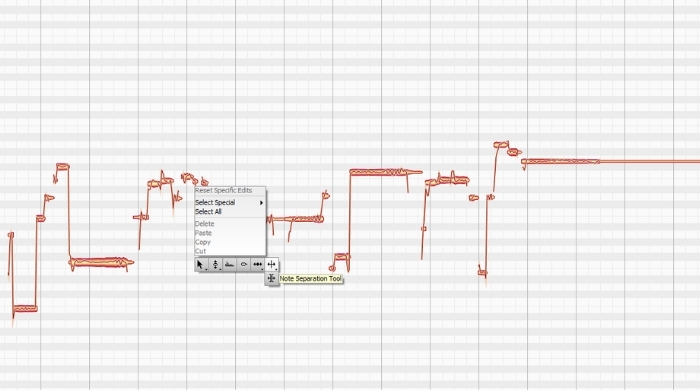
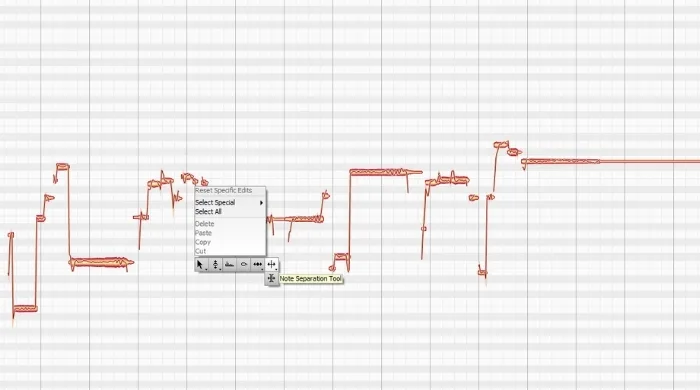
With this tool, you want to separate a beginning and an end of each note.
You don’t have to go too far. A slight trim on the edges of every note will do the job.
Then, select the part in the middle and apply as much pitch drift as you like. You can access this tool by right-clicking, and under Pitch Tool, either choose Pitch Modulation or Pitch Drift.
Even if you make it a straight line, it still won’t sound as processed because the bridge to the note was left intact. This way, you can get a natural-sounding performance that hits every note right in the center.
Related Questions
How much pitch and time correction do you need?
That will entirely depend on what style you’re after. Some genres like folk and rock can take minimal correction and sound very true to the nature of the music. However, modern pop productions usually feature heavily edited performances.
How important is the ARA integration of Melodyne into Studio One?
For people who are used to using Melodyne, it comes as an immense relief not to import your audio into it and use it as a 3rd party software. Everything is smoother, faster, and more powerful, so I guess it is essential indeed.
Does Melodyne eat up a lot of RAM memory?
If you’re concerned about RAM memory, a good trick is to bounce all of your Melodyne edits and free up some space for the rest of your plugins. Once you think you’re done with editing, just press Ctrl+B, and Melodyne will be removed from that track.
Is Melodyne only integrated with Studio One?
Back in the day, Studio One was the only DAW that had it. Still, in the meantime, a couple of other major DAW’s (Cubase and Logic) have implemented the same thing in their workflow.
Is Melodyne worth the money?
Since it is one of the best audio editing tools out there, I’d say that it definitely is. It’s crazy how many options it offers and the things you can do with it.
What is the difference between Melodyne editor and studio?
The studio version just comes packed with more features, most notably the ability to edit multitrack recordings.
Is Melodyne a VST plugin?
It essentially is a virtual instrument, but thanks to ARA integration, it doesn’t feel like a plugin but more like a native editor.
Want To Create Fades In Studio One?
Click HERE to learn how.