KEY TAKEAWAYS:
Applying fadeouts in Studio One can be done in two ways: moving the blue triangle at the top right corner of your audio track to the left or automating the volume fader.
Learning how to apply the fadeout effect in your productions properly is a big deal.
It may seem like a trivial task, but it makes a difference between a pro-sounding track and an amateur one.
In this article, we’ll focus on two methods to help you make the most out of this seemingly simple technique.

Studio One Crossfade
Here’s what we’ll need
- Any plugin that has an output volume that can be automated
- An audio clip
Why Are Fades Important?
Aside from using it as an effect to end your songs, fades are a crucial part of a well-edited recording.
Most of the audio recordings you make will inevitably have some noise in between the playing.
Fades are a perfect way of eliminating that and keeping the take nice and clean, especially when dealing with merged files of a single performance. And there’s nothing like a good old-fashioned fadeout to end the song in style!
Method One – Using Audio Event
Studio One has a very streamlined approach when it comes to creating fades. It’s not something revolutionary and unique to Studio One alone.
Still, I like having all the possible options performed through relatively simple tasks.
Unlike some DAWs, Studio One has no pop-up window offering various fade options. Everything is performed right on the audio event, which is a great plus in my book.
It keeps the flow going while not sacrificing all the possible variations you can assign to your fades.
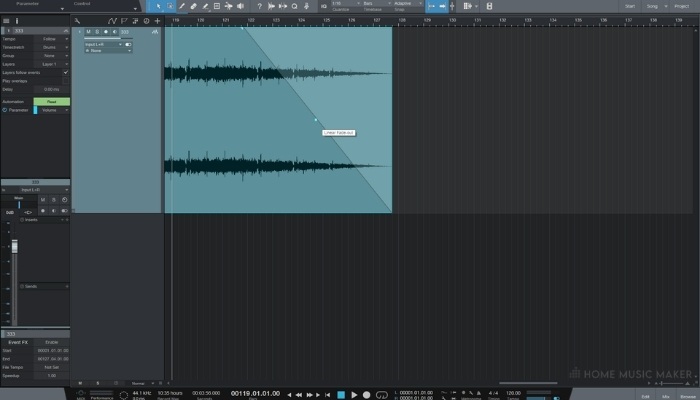
To apply a fadeout to your track, click on the audio event.
At that point, you will see several things appear on your recording.
Symbols relevant to our task are two triangles in the top two corners.
Essentially, sliding those triangles creates a fade out or fade in.
It’s as simple as that.
READ NEXT:
Studio One Fade In And Fade Out
Move the right triangle to the left to create a fadeout. The same applies to creating a fade-in; slide the left triangle to the right.
You’ll get a visual representation of how deep and wide you want your fade to be.
Manipulate Fade-Out Settings
You can easily do so by moving the little blue square that appears in the middle of the waveform.
By default, we have a “linear fadeout.” This provides a gentler fading effect that is nicely balanced for most applications.
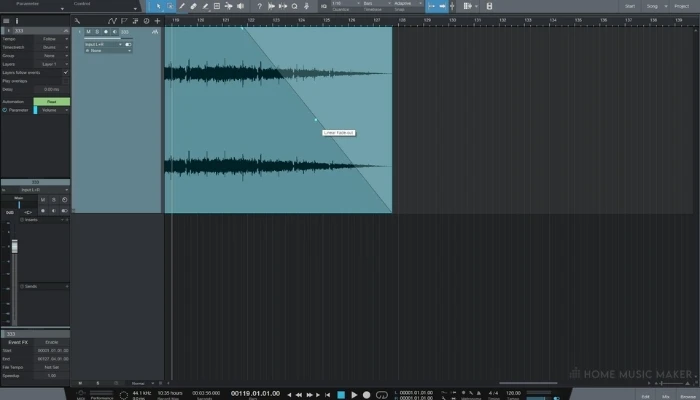
If you wish to exaggerate or soften the fade effect, you can choose logarithmic or exponential fade out.
Logarithmic fadeout mode can be engaged by sliding the blue square upwards.
Logarithmic Fade-Out

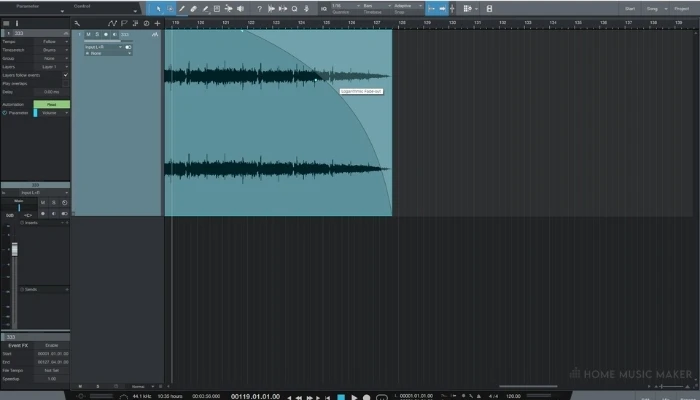
This mode makes for a softer fade effect that’s perfect for a very long ending as things get quieter without you realizing it until the track has been dramatically reduced in volume.
Exponential Fade-Out

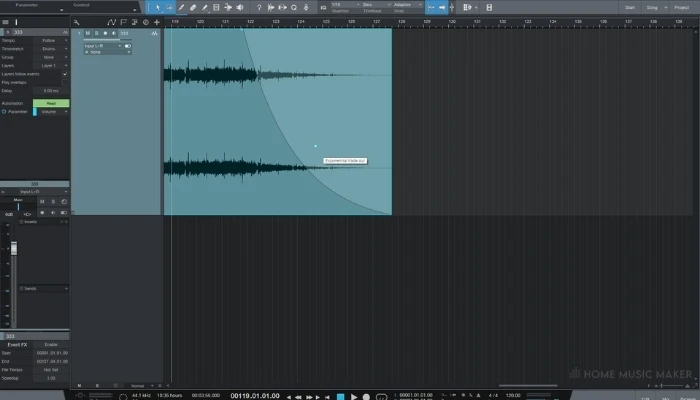
On the other hand, if you’re going for an aggressive fadeout effect, switch to the exponential mode by sliding the blue square downwards.
If you’re after a dramatic effect or need to silence a specific part of the performance, this is the way to go.
See how to do it below.
Of course, you can manually set the depth of your fading effect by how much you slide upwards or downwards.
It’s intuitive, so I think you’ll have no problems getting the hang of the process.
As much as everything feels nice and simple, this method has one major drawback if you want a solid fadeout to your song.
All this volume reduction caused by the fades happens before the signal hits all your plugins.
This means that your gain staging will fall apart, and things will start sounding stranger with every second of your fadeout process.
For example, suppose you have a compressor working optimally at a volume you have chosen for your mix. In that case, it will start acting differently as the track’s volume decreases with the fade.
Second, by second, you’ll slowly witness your whole mix falling apart before it weirdly slips away into complete silence! Not something you want to happen, so we’ll explore another method to combat this.
Method Two – Automate The Volume Fader

If you’d like to avoid troubles due to applying fades directly on the track. In that case, you can automate the volume fader precisely how you want it.
That way, your gain structure will remain the same resulting in a natural-sounding fadeout.
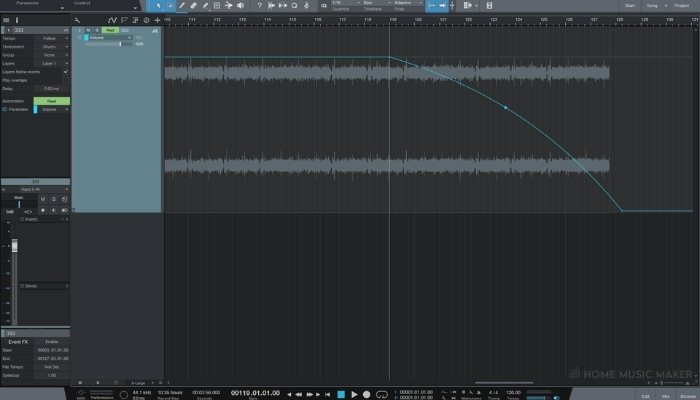
To engage automation mode, press “A” on your keyboard or right-click on the channel and choose Show/Hide Automation.
A more straightforward approach would be to right-click on the channel’s volume fader you want to fade out and select “Edit Volume Automation,” as seen here.
Besides keeping your gain structure intact, this method allows you to manually set the speed of your audio fade precisely the way you feel it should be.
I was never satisfied with the results the automatic curvature gave me. It would either fade too slowly or too suddenly. This way, you’re entirely in control of how you want it to sound.
If Automating Isn’t Your Thing
You can mitigate the problem of the first method by printing your final mix and then applying the fade-out on the audio clip.
Using Fades In Editing

As we’ve discussed earlier, fades are crucial to editing performances, especially if multiple takes are merged into a single one.
Small crackles and pops at the transition point usually happen due to merging different tracks.
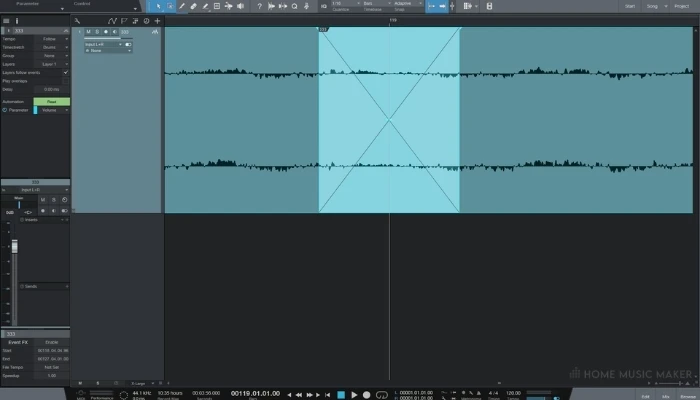
We can quickly eliminate those by applying tiny fades at the transition, namely at the end of the first take and the beginning of the following.
I usually start with a slight fade to keep the natural flow of the performance and slowly widen it if the previous one doesn’t reduce the noise.
As shown below, you can simplify this process by selecting the two events to which you want to apply fades and pressing “X” to create a crossfade.
READ NEXT:
Related Questions
How to Make All Audio Stop, Including Delays and Reverb Tails?
You can easily do so by fading or muting the master bus to which all mix elements are routed.
Which Method Is Generally the Best for Applying Fadeouts?
I often apply fades right on the track as it is the most convenient way. However, when going on a whole-song fadeout, I always automate the volume as it gives me more control and doesn’t mess up my gain staging.
Why Are Crossfades so Important?
Clicks and pops at the transition points of takes might not be as apparent in busy arrangements. Still, it will be in intimate vocal parts or any upfront element of your mix. It’s better to get rid of it rather than worry if listeners will pay attention.
When Is the Right Time to Fade out A Song?
Not all of the songs need a fadeout. I enjoy it the most on some sad songs with a nice repetitive hook in the outro. That’s when a fadeout leaves a lasting impact on me after the song ends.
READ NEXT:
Suffering from horrible static noise? Check this guide on how to remove static in Studio one.