Why Studio One Clipping Has Occurred
Wondering why Studio One clipping has occurred when exporting your final mixes? You should consider two things – gain staging and transient control. Mastering these two things alone will make clipping a thing of the past.
Do you struggle with getting your mixes not to clip? Although the overall volume doesn’t seem that hot, do you still get a clipping of 5dB or more after your export?
This is an entirely normal part of every mixer’s development. Although it is frustrating, trust me – we’ve all been there at some point.
In this article, I’ll try to explain two crucial concepts – gain staging and transient control so that you can deliver clean, clipping-free mixes every time.
Here’s what we’ll need:
- Any Gain or Trim plugin
- Any Limiter
- Any Saturation/Distortion plugin
Gain Staging In Studio One
Gain staging seems to be this mystical concept that most people tend to make a bigger deal out of than it is. Let’s simplify it and get right down to the core of the problem.
Gain staging simply means optimizing the amount of gain/volume you send into every plugin in each step of the plugin chain. From your first plugin to the master limiter at the end.
Think of it this way – every plugin is designed to work optimally at a particular volume. If your signal is too hot and hits the plugin at an insanely high volume, the plugin won’t react the way it’s meant to.
Your compressor will over-compress right away, the saturation effect will immediately shift into bit crushing, and EQ will simply act weird and out of control.
What you want to do instead is optimize this volume between plugins so that each one receives a proper amount of gain.
But how do you do this, and how much gain is optimal?
We do not want to drive our plugins too hard, but we also don’t want to feed them an insufficient amount of gain.
Unlike in many other mixing situations, specific numbers can actually help us out here.
Whenever I start a mix, I tend to set my initial target level at around -10dB for my loudest parts of the mix (kick, snare, and vocals).
I know that further down the mixing process, my peaks will inevitably become a bit louder as I apply more and more processing. If I reach -6 or -7dB by the end of the session, I’m good to go.
The trick is to maintain that initial volume of the channel you’re working on as much as possible.
If you load a plugin on, let’s say, a kick drum. When you’re done processing, always bypass it and ensure that the overall volume stays the same before and after that particular plugin.
Repeating this process after every instance will make sure your gain structure remains the same throughout the mixing session.
You will benefit from this approach in three ways:
- Your plugins will work as they should because you feed them an appropriate amount of gain.
- Your mixing decisions won’t be masked by volume changes (louder always sounds better!)
- You won’t clip your master bus when exporting mixes for mastering.
How can you be sure that you’re sending enough gain into your plugins?
Most of the plugins have an input meter that shows how hard you’re driving it, and they’ll also sneakily suggest the sweet spot.
If the plugin has a good old-fashioned VU meter, there will be a red zone that you probably want to stay away from. Keeping the needle somewhere between the middle and the red zone is usually a way to go.


Plugins with a modern design will have a meter that shows your input gain in much the same way.

The input bar will turn yellow when approaching the “hot zone” and red when you’re in the clipping zone.
What to do if you like the sound you’ve got with insufficient gain staging, and you don’t want to drive your following plugin in the chain too hot?
Every mixer I know has been guilty of getting themself in this kind of situation, but that’s fine. Whatever sounds good is fair game as far as mixing goes.
Sometimes you roll with bad gain staging, and you get a fantastic sound.
Perhaps you’ve driven your saturation or compression plugin a bit hotter, but it produced some fantastic results. But objectively, the signal is now really, really hot, and your following plugin is going to suffer for it, so what to do?
An easy solution is to use a gain/trim plugin.
This thing lets you adjust the volume after the plugin without affecting the sound you got beforehand.
Reducing your signal by 5 or 6dB will usually be enough to maintain a nice overall gain structure. If in doubt, always consult your input meters on plugins.

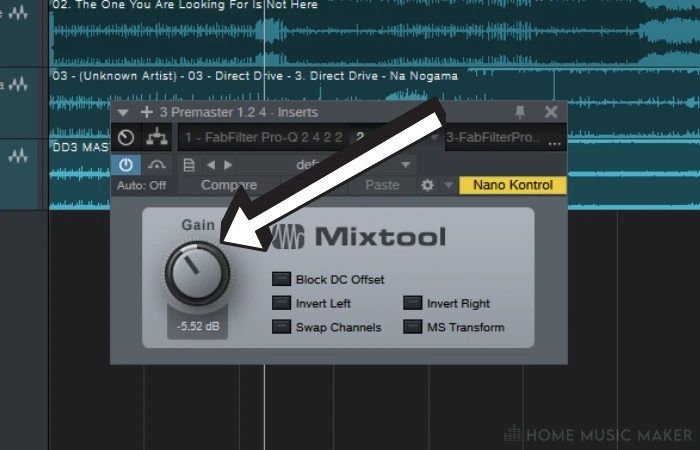
This way, you can take complete control over your gain staging. You can afford to play around with the sound by driving some plugins a bit hotter while not allowing anything to get out of control and clip your master bus as a consequence.
So, in order to prevent clipping on the master bus, here is what I suggest you do in your next mixing session:
- Determine your loudest elements in the mix and set a loudness target at around -10dB
- Make sure that the volume before and after each plugin remains roughly the same
- Adjust the volume between the plugins with a gain knob or trim plugin if needed
Studio One Transient Control
Transient control is another vital part of preventing clipping.
Usually, they are the number one reason your mix may clip during export in Studio One or other DAWs.
A transient is a tiny part at the beginning of the waveform of any signal. That’s basically where all the attack and punch come from, so it can get wildly out of control without you realizing it.
I’d say that most of the confusion about clipping comes down to this:
Transients get incredibly loud through aggressive processing, but since they last a very short time, the track’s overall volume still feels pretty low.
Many inexperienced mixers are baffled by their mix clipping the master bus while the song seems to be way below what the reading on the meter shows.
This is where transient control is crucial.
Transients mainly get amplified through aggressive compression. And I get it, if you produce electronic or rock music, you want those transients to punch like crazy.
But we need to tame those a little bit to prevent clipping.
The easiest way is to apply a limiter on a group channel that seems to cause the clipping to occur.
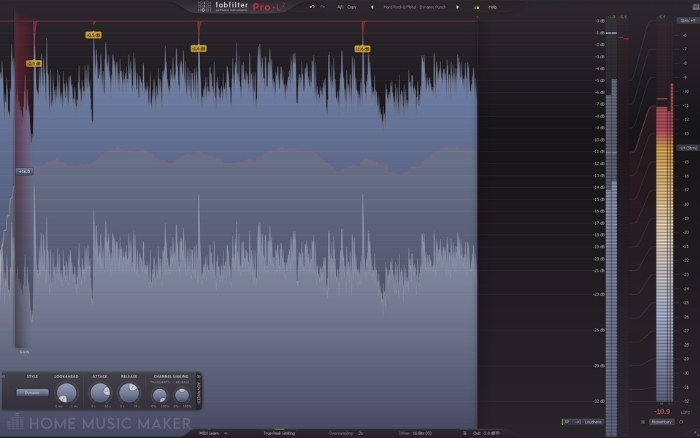

This usually happens with the drum bus. Some other suspects may be a bass guitar and some funky guitar parts with lots of string noise.
While slapping a limiter will certainly prevent clipping, it will severely affect your transients.
Considering that you will use another limiter on the master bus, you want to try and minimize the gain reduction on your limiter to 2 or 3dB maximum to avoid having your transients completely smashed and punch-free.
Saturation allows you to kind of keep the best of both worlds – transient volume will be severely reduced while the impact of the transient will still be there.
In some cases, the “punch effect” might even get exaggerated with only a fraction of the initial volume.
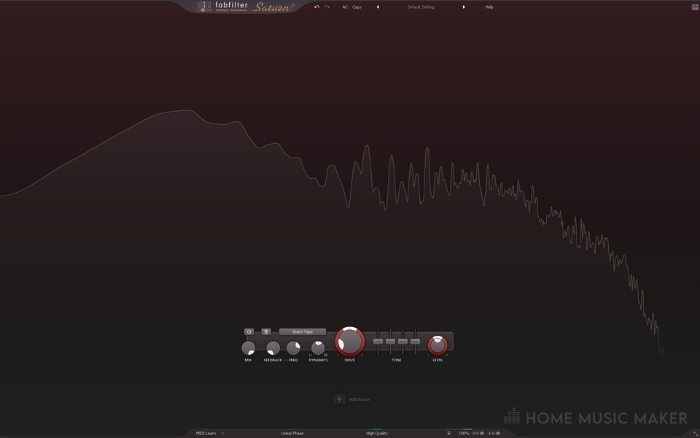
The trick here is not to overdo it and go crazy with distortion. The more saturation/distortion you apply, the more transients get choked. A little bit goes a long way and usually proves to be the best trade-off.
Related Questions
How much headroom do you need for mastering?
If my peak level gets to around -6dB, I’m happy with that. Of course, this isn’t a strict rule; you could go a dB or two above or below that target, although a mastering engineer will usually want more headroom.
How solve the issue and remove clipping after you already recorded it?
I’d suggest discarding the take completely, as it’s usually better to redo it than try to salvage the shipwreck. There are plugins that kind of “de-clip” your signal, but I wouldn’t suggest relying on that at all.
What does audio clipping sound like?
Digital clipping can be easily heard as a very unpleasant distortion of the signal. It is different from the musical distortion/saturation you get from slightly pushing analog gear or using a plugin.
How to find clipping in a bunch of tracks?
I would start by muting the kick and the snare. Those two are usually the main reason for clipping. If that doesn’t solve the issue, a good trick is to mute all channels and start adding them one by one until clipping is reintroduced.
Does the master clip continuously or just from time to time?
Usually, it will clip from time to time on extreme transients. If it constantly clips, it will be pretty apparent that something’s not right in your mix.
When mastering, what processor should come after the limiter?
Limiter should be the last plugin in your entire chain. Every other plugin you open after it has the potential to clip your track.
How do you create headroom in a mix?
Headroom is achieved through transient control, the balance of transients and rest of the music, and sticking to a set loudness target level.
Looking For An Awesome Mixing Hack?
Check out our guide to mixing with pink noise HERE.