The easiest way for you to sidechain in REAPER is to insert a VST plugin on the track you wish to control (Track A). You then create a send to that VST from the track you want to control it with (Track B).
What Is Sidechaining In REAPER?
Sidechaining is when you set one audio signal to alter the processing of another.
For example, you can use sidechain compression to make a synth pad pump in and out every time a kick drum plays. This technique is also known as ‘ducking’ because you are using one audio signal to ‘duck’ the volume level of another.
This popular music production trick has many different potential purposes. Some of these include clearing up space in a cluttered mix or controlling the volume level of a music track against a voiceover track.
This step-by-step tutorial will show you how to use sidechain processing in REAPER and demonstrate some of its various applications.
What You Will Need
Although you can use the techniques shown in this tutorial with many 3rd party plugins, every tool that I use in this walkthrough will be a free VST plugin that comes with REAPER.
- REAPER DAW by Cockos
- ReaComp VST plugin
- ReaGate VST plugin
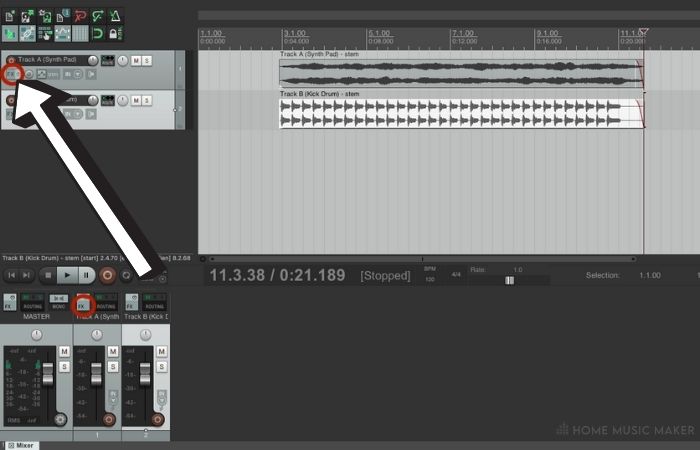
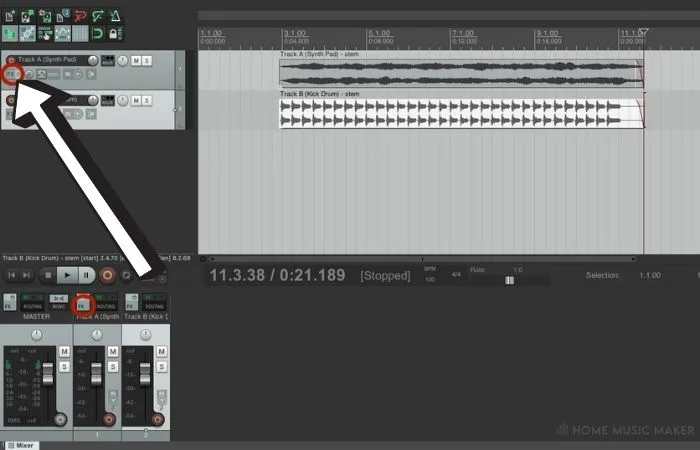
Step One – Inserting The Plugin
The first step is to insert the VST plugin you want to use onto the track you wish to control with your sidechain (Track A).
To complete this step, click FX on Track A and select the plugin you want to set up your sidechain. Your list of plugins will open after pressing FX.
You can either double-click the VST plugin you want to use, or you can drag and drop it into the FX window from your list of VST plugins.
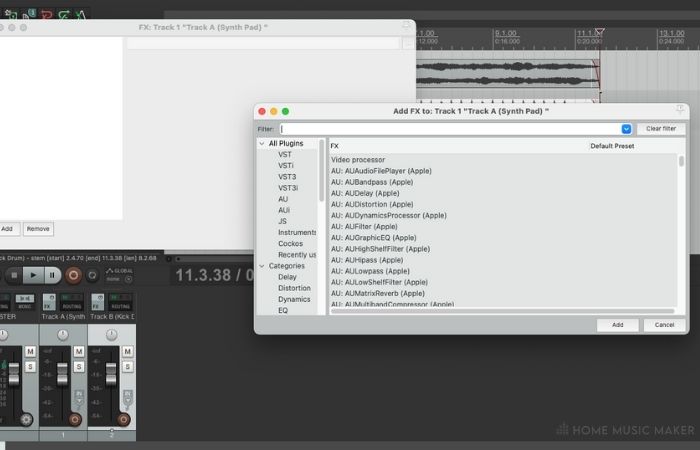
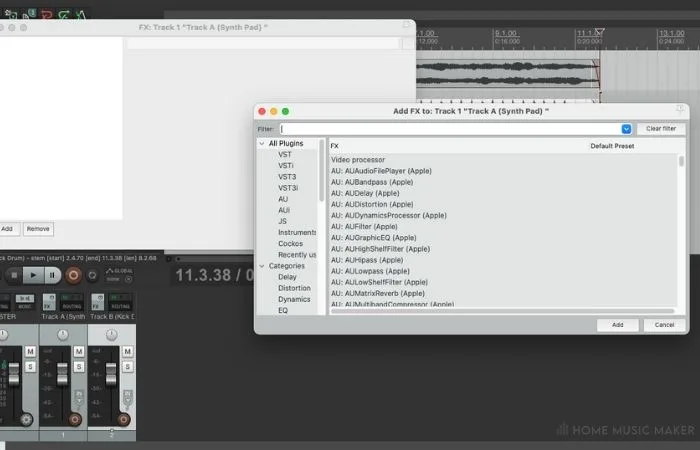
For this first example, I will be showing you sidechain compression using ReaComp to control a synth pad with a kick track’s signal.
Step Two – Creating Your Send
After you have inserted your desired VST plugin onto Track A, we can create a send to this plugin from the one we want to control it with (Track B).
To do this, click and drag from the routing button of Track B and drop this send onto the plugin on Track A.
Step Three – Setting Your Plugin Input
Now that we have created a send from Track B to the plugin on Track A, we need to set the correct input.
To complete this step, click on the Detector input drop-down menu on ReaComp and select Auxiliary Input L + R.
Once you have done this, your sidechain compressor is set up and ready for you to tweak!
Step Four – Adjusting Your Plugin
With our correct input selected and our sidechain set up, we can now adjust the settings on ReaComp to control our sidechain compression.
The best place to start setting your sidechain compression is by turning up the ratio and adjusting your threshold as desired.
The other settings, such as Threshold, Attack, Release, etc., will also change how ReaComp compresses Track A.
Take some time to adjust these as well and see how they affect your sidechain compression.
Because we are now using sidechain processing on this track, this compressor is being triggered by the signal of Track B (kick drum) instead of Track A (synth pad).
This will cause our kick drum to compress our synth pad every time it plays. Giving us that awesome pumping effect you hear in modern hip hop and electronic music.
Other Applications For Sidechaining In REAPER
As I mentioned earlier, sidechain processing is a technique that you can apply in many ways.
In this section, I will show you some of the other ways you can use sidechaining in your productions.
Keep in mind that you will follow the same steps laid out above for all these methods other than the VST plugin that you use and how you adjust the plugin’s settings.
Using Sidechain Compression To Control Music Against A Voiceover
A popular use for sidechain compression is to control a music track behind a voiceover track.
Suppose you have a music track and a voiceover track playing simultaneously. In that case, you can use this technique to duck the music track whenever the voiceover is playing.
In this example, Track A will be our music track, while Track B will be our voiceover track ducking Track A.
Start by placing ReaComp on Track A. Assign a send from Track B to this plugin, and set the plugin’s Detector input to Auxiliary Input L + R.
Now, when the vocal track plays, it will compress our music track to make the voiceover audio track clearer.
We can adjust the different settings in ReaComp to change how the voiceover’s signal compresses the music.
Controlling A Gate Using Sidechain Processing
Another way you can apply sidechain processing to your workflow is by using it to control a gate plugin.
You can use this strategy to give a synth pad an interesting rhythmic effect when a hi-hat triggers the gate.
In this instance, our synth pad will be Track A, and our hi-hat will be Track B.
We will start by inserting ReaGate onto our synth pad and then creating a send to this VST plugin from our hi-hat. Then following that, set the detector input the same way we did earlier in Step Two.
As we adjust our threshold on ReaGate, you will notice that you can hear the synth pad every time the hi-hat plays. Keep in mind that if the threshold is too high, no signal will come through at all.
This is because the audio signal of the hi-hat is now controlling the gate and not the synth pad.
Related Questions
What are some reasons you would want to use sidechain compression?
Creating a pumping effect on a synth pad track using a kick track’s signal.
Preventing masking in the low end between a kick track and bass track.
Making space in a full or busy mix.
Can you use 3rd party plugins to sidechain in REAPER?
Yes, you can use these REAPER sidechain techniques with many 3rd party plugins. Start by inserting the plugin you want to use and follow the steps I have laid out in this tutorial.
As long as the plugin you want to use allows you to assign an auxiliary input as your detector input, you should have no problem using these techniques with a 3rd party VST.
How do I know if I should apply sidechain compression?
Suppose you have trouble controlling two elements in a mix that occupy a similar frequency range with standard EQ and compression techniques. In that case, it might be an excellent time to try and use sidechain compression to duck one of the tracks that are giving you issues.